As a motorcycle owner, it helps to understand the basics of how the machine operates. Just as with your car battery, it can save you time and money to know the proper methods of maintaining your motorcycle battery.
Here are some tips for charging your bike’s battery:
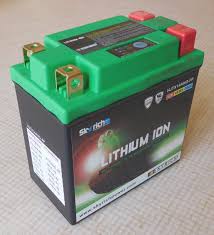
First, you’ll need to determine what type of battery your motorcycle uses. If you have absorbed glass mat, gel or lead acid batteries, you can charge them conventionally. Conventional chargers are available in three forms: trickle charger (aka fully manual), float charger and smart charger. If you have a lithium-based battery, it’ll need a special charger. Then, although not necessary, it’s safer to remove the battery to prevent potential harm to the bike while charging. Hook up the charger to the battery terminals. Any order is acceptable, however, it’s essential to ensure they’re connected correctly and securely attached to the battery before you plug in the charger. After a few hours, unhook it and test the battery.
we delve into the heart of two-wheeled journeys, exploring the unsung hero that keeps the engine roaring—the motorcycle battery. Navigating the open road involves more than just a reliable engine; it’s about understanding the powerhouse that kick-starts your adventures. It’s not just about power; it’s a dynamic interplay of volts and amps, ensuring your ride stays charged and ready for the next exhilarating journey. As we unravel the dynamics of a motorcycle battery, we unveil a vital component that demands attention, maintenance, and an understanding of its role in fueling the freedom of the open road. From lithium-ion to lead-acid, each battery type becomes a crucial element in the symphony of motorcycle mechanics, propelling riders into the thrilling realms of their on-road escapades.
Tools Need for a Battery Change
While there are many online resources for performing motorcycle maintenance and repairs, having your bike’s service manual can be an invaluable resource. It should contain practically everything you’ll ever need to know about your motorcycle. Being model-specific, it’ll tell the exact tools you’ll need for the job.
Some of the standard tools for replacing a battery include the following:
- Multimeter – different types of multimeters are available, but all will allow you to check your battery and diagnose electrical problems. The process of determining the condition of your bike’s battery is similar to how to tell if car battery is dead.
- Wire brush – A wire brush is helpful for ridding corrosion and debris from the battery and/or cables.
- Wrenches – Keep a complete set of wrenches on hand so you’ll have the right size and length any time you need them for motorcycle maintenance and repairs.
- Torque wrench – A torque wrench will help you tighten a bolt as tight as you need without the risk of stripping it.
- Sockets – As with wrenches, it’s best to have a full set of sockets for any job, be it battery replacement or motorcycle repair.
How To Properly Install Your Motorcycle Battery
The first step in installing a battery in your motorcycle is to re-insert the lead nuts into the case. Then, place the battery. If the cables are corroded or have whitish or bluish powder on them, you’ll need to brush the corrosion off with a wire brush. The cables must be attached in the reverse order of their removal. It’s critical to hook up the positive cable first. Then, attach the negative cable. Double-check to ensure you’ve connected the correct cable to the correct terminal. Otherwise, it could result in expensive repairs. The terminals should be snug but not tight. Turn on the ignition to test it. The headlights should power on evenly without flickering.
When it’s time to replace your motorcycle battery, search for a reputable local auto parts store or online retailer. You’ll find the perfect battery to fit your motorcycle and all your riding needs. Then, remember to safely recycle your old battery.
if you want to know about New or Used Motorcycles: Which is Better? then please visit our Business Category.