Introduction
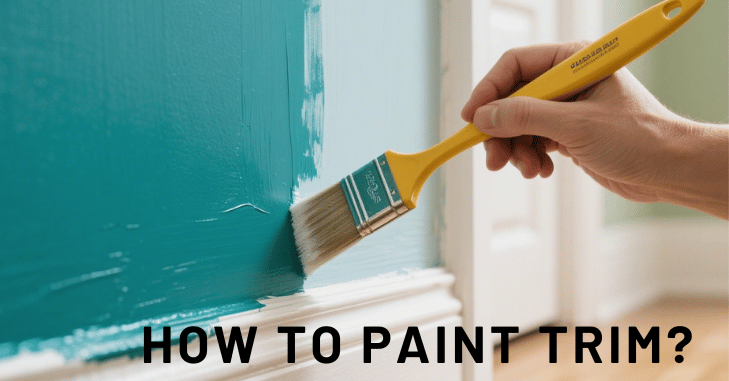
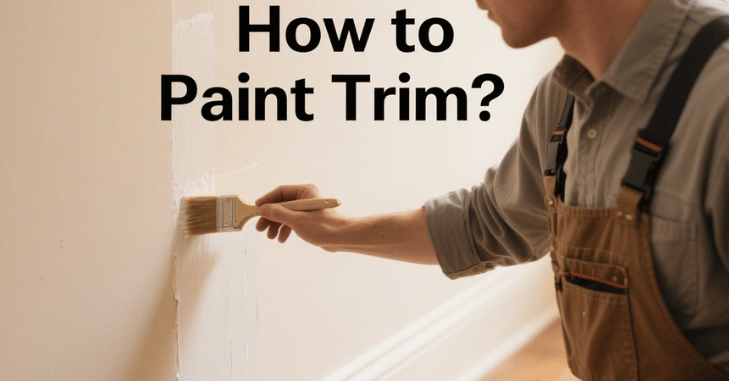
How to paint trim? Painting trim is one of the most effective ways to refresh and elevate the look of any room. Whether you’re tackling baseboards, window casings, or door frames, a well-painted trim provides crisp, clean lines that highlight architectural details and complement your overall décor.
However, achieving a flawless finish requires more than just slapping on paint; it demands proper preparation, the right materials, and careful technique. From protecting your surfaces to applying the final coat, each step plays a vital role in ensuring the trim looks polished and professional for years to come.
Once the paint is completely dry, carefully remove any painter’s tape at a 45-degree angle to avoid peeling. With patience and the right tools, painting trim can yield crisp lines and a polished look that elevates the entire space.
| Step | What to Do | Tools Needed |
| 1. Prep Area | Cover floors & tape edges | Drop cloths, painter’s tape |
| 2. Clean Trim | Wipe off dust and grease | TSP/mild cleaner, cloth |
| 3. Sand Surface | Lightly sand for smooth adhesion | Sandpaper, tack cloth |
| 4. Fill Gaps | Use filler or caulk, then sand smooth | Wood filler, caulk, putty knife |
| 5. Prime | Apply primer if needed | Primer, angled brush |
| 6. Paint | Brush or roll with smooth, even strokes | Semi-gloss paint, brush/roller |
| 7. Finish | Sand between coats; remove tape carefully | Fine sandpaper, utility knife |
How to Paint Trim?
How to paint trim? Painting trim can dramatically enhance a room’s appearance, but it requires careful preparation and technique to achieve a clean, professional look. Start by protecting your space with drop cloths and painter’s tape to shield nearby walls, floors, and furniture from drips or splatters.
Thoroughly clean the trim using a damp cloth or a solution like TSP to remove dust, grease, and grime, ensuring better paint adhesion. Next, lightly sand the trim to smooth imperfections and dull any existing gloss; this step is essential for creating a surface the paint can grip. After sanding, fill any gaps or nail holes with wood filler and use caulk where the trim meets the wall, then sand smooth once dry.
If the trim is unfinished, stained, or previously painted a dark color, applying a coat of primer is crucial to prevent bleed-through and ensure even coverage. When it’s time to paint, use a high-quality angled brush for detailed edges and a small roller for flat sections, applying long, smooth strokes in the direction of the grain.
Why Painting Trim Matters?
Trim frames your walls, floors, windows, and doors. When done right, it provides a sharp contrast or a seamless blend that complements the room’s style. Clean, freshly painted trim:
- Highlights architectural features
- Makes wall colors pop
- Adds a polished, high-end finish
- Increases the overall value of your home
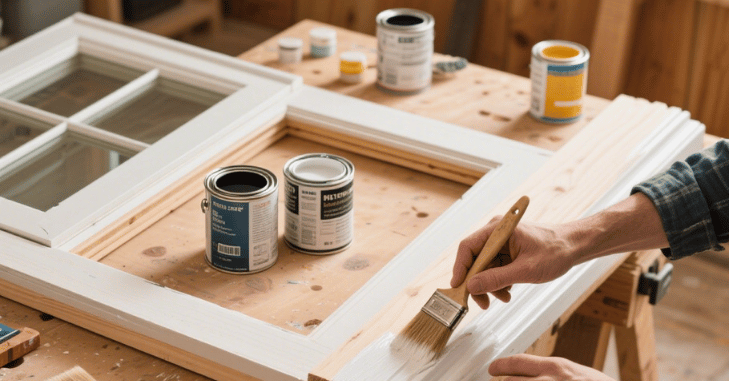
Materials and Tools You’ll Need
Before you begin, gather the right tools to ensure efficiency and quality:
- Painter’s tape
- Drop cloths or plastic sheeting
- Sandpaper (120–220 grit)
- Wood filler or caulk
- Putty knife
- Cleaning solution (TSP or mild detergent)
- Paint (typically semi-gloss or gloss finish)
- Primer (if needed)
- Angled sash brush (1.5 to 2 inches)
- Small roller (optional for wider trim)
- Damp cloths
- Ladder or step stool
Choosing the Right Paint Finish for Trim
Selecting the proper paint finish is just as important as choosing the right color. Trim is exposed to frequent contact, scuffs, and cleaning, so durability matters. Semi-gloss is the most commonly recommended finish because it resists moisture, is easy to wipe clean, and highlights architectural details with a subtle shine.
High-gloss provides even greater durability and a dramatic look, but may emphasize surface imperfections if the trim is not properly prepped. Satin offers a softer sheen and works well in low-traffic areas. Understanding these finish differences ensures your painted trim not only looks beautiful but also stands up to daily wear.
Step-by-Step: How to Paint Trim?
1. Protect Your Space
Cover the floor with drop cloths and tape off adjacent surfaces like walls or doorframes. Good preparation protects against accidental drips or splatters. Secure plastic or canvas sheeting firmly to prevent it from shifting. Take the time to carefully tape corners and edges for clean lines and minimal mess.
2. Clean the Trim
Use a damp cloth or a cleaning solution like TSP to remove dust, grime, and grease. Clean surfaces ensure better paint adhesion. Pay extra attention to areas near the floor where dirt builds up. Allow the trim to dry fully before moving to the next step.
3. Sand the Surface
Lightly sand the trim to remove gloss from previous paint and smooth out any imperfections. For new trim, standing helps prep the surface for primer. Wipe away dust with a tack cloth. Always sand in the direction of the grain to avoid scratches. If you’re working with old paint, wear a mask to avoid inhaling dust particles.
4. Fill Gaps and Holes
Use wood filler for nail holes or dents and caulk for gaps between the trim and wall. Let them dry, then sand them smooth. This step is crucial for achieving a professional-looking finish.
Use your finger or a damp cloth to smooth calm for a seamless look. Allow all fillers to dry fully to prevent paint cracking later.
5. Prime the Trim
Use primer if:
• You’re painting over a dark color
• The trim is unfinished wood or stained
• There are repairs or patching involved
Apply primer with an angled brush or small roller. Let it dry completely before moving to the next step.
Primer helps seal porous surfaces and boosts paint durability. One coat is usually sufficient unless you’re covering bold stains or knots.
6. Cut In with Precision
Use painter’s tape to protect adjacent areas, but don’t rely on tape alone. Using a high-quality angled sash brush, carefully cut in along the edges. This brush gives better control for clean, straight lines. Keep a steady hand and work in small sections. Reload the brush frequently to maintain even coverage.
7. Apply Paint
Use your angled brush for detailed areas and a small roller for flat, wider sections. Apply paint in long, smooth strokes in the direction of the grain. Avoid overloading your brush to prevent drips or runs. Start from the top and work downward to catch any drips. Feather out each stroke for a smooth, uniform finish.
8. Lightly Sand Between Coats
Once the first coat is dry, lightly sand it with fine-grit sandpaper. This step smooths any brush strokes or raised grain. Wipe away the dust before applying the second coat. This extra sanding creates a polished, even surface. Be gentle to avoid removing too much paint.
9. Apply for a Second Coat
Repeat the same brushing technique, ensuring smooth and even coverage. Two coats usually suffice, but a third may be needed for high-contrast color changes or added durability. Allow the final coat to dry thoroughly for a durable finish. Inspect your work under good lighting and touch up any missed spots.
10. Remove Painter’s Tape Carefully
Once the final coat is dry to the touch, remove the tape slowly at a 45-degree angle. Removing tape too early can cause smearing; too late, and it can peel off paint. Score the edge of the tape with a utility knife if it resists pulling. Discard tape carefully to avoid smudging fresh paint.
Tips for Best Results
When painting trim, it’s essential to use quality paint and tools. Higher-grade brushes, paints, and primers result in smoother application and longer-lasting finishes. Equally important is allowing adequate drying time between coats; rushing this step can lead to smudges, bubbling, and an uneven look.
Always work in good lighting, such as natural daylight or bright LED lamps, to help spot brush strokes and missed areas more easily. Lastly, consider the finish you want to achieve semi-gloss is a popular choice for its durability and ease of cleaning, while satin offers a more subtle, elegant appearance.
Common Mistakes to Avoid
- Skipping prep work. Paint won’t adhere properly to dirty or glossy surfaces.
- Overloading the brush. This leads to drips and uneven coats.
- Painting over wet caulk or filler. Always allow full drying time to avoid cracking and bubbling.
- Using flat paint. Trim should be more durable, and flat paint tends to scuff and mark easily.
When to Repaint Trim?
You may need to repaint your trim if the current paint is showing signs of wear, such as yellowing, chipping, or cracking, which can make even a freshly painted room look outdated. Repainting is also a smart move when updating your wall color, as it helps maintain a cohesive and refreshed aesthetic throughout the space.
A new trim color can also create a more modern or dramatic contrast, especially if you’re aiming to enhance architectural details or make a bold design statement. Additionally, visible water damage or trim staining affects appearance and may indicate deeper issues—repainting after repairs can restore both beauty and protection.
Conclusion
In summary, How to paint trim? painting trim is a rewarding DIY project that can transform a space when done thoughtfully. By taking the time to properly prepare, use quality tools and paints, and apply multiple careful coats, you’ll achieve smooth, durable results that enhance your home’s aesthetic and value.
Remember to pay attention to details like standing between coats and removing painter’s tape with care to avoid common pitfalls. Whether refreshing worn trim or creating bold contrasts, mastering the art of painting trim adds a subtle yet significant finishing touch to any room.
Want to know about ‘Best Paint for Exterior Door: Explore Types, Brands, Finishes and How to Choose the Right One for You‘ Check out our ‘Home Improvement‘ category.
FAQs
Wipe off excess paint after dipping the angled paintbrush no more than an inch into the paint. Cover a couple of feet of the trim with short strokes.
Satin or semi-gloss finishes are the most popular and ideal sheen for interior trim.
Brush marks can be avoided with long, smooth strokes that are directed toward the grain.
Don’t worry if you do inadvertently get paint on the trim! Just scrape off the dry paint with a razor blade or putty knife.
For more tips on improving your home’s interior, check out Why Choose Nearby Playschools
For more information on choosing nearby playschools, visit Why Choose Nearby Playschools